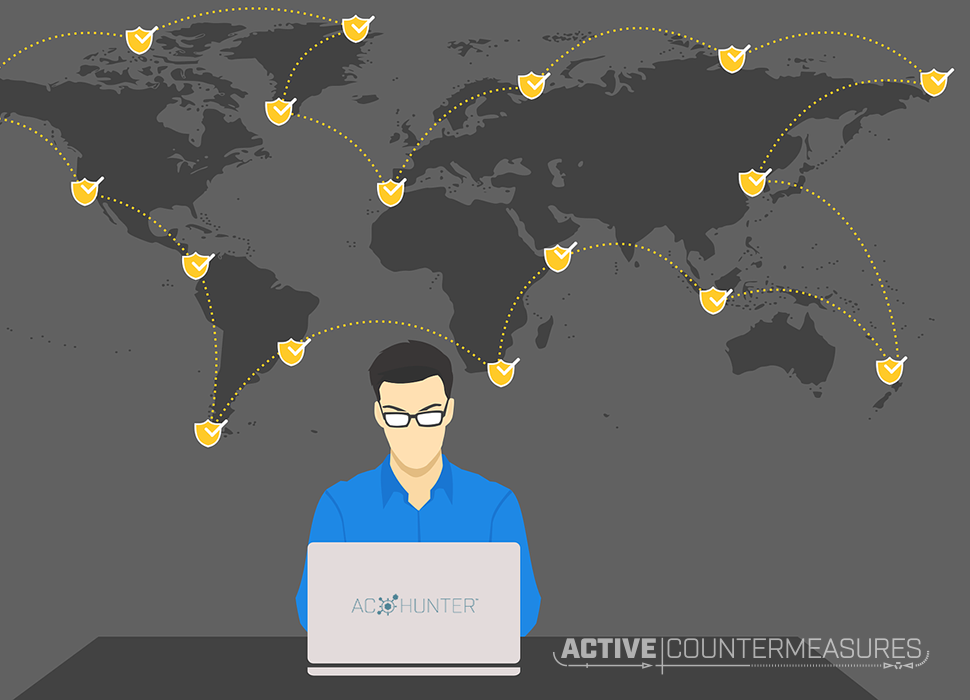
AC-Hunter Whitelisting
It’s been a while since we’ve discussed whitelisting in AC-Hunter, but it’s a good time to revisit it – we’ve made a lot of improvements to it.
Filtering by Hostname or Domain
The really big development is filtering by name. Let’s say your systems make a lot of (legitimate) requests to hosts run by googleapis.com. The goal is to stop viewing these legitimate connections in AC-Hunter so we can filter on the bad and iffy ones. Instead of listing the IP addresses of all of these hosts, we can tell AC-Hunter to whitelist all connections to hosts under that domain.
When you look at one of these connections in the BeaconsFQDN tab of AC-Hunter’s web interface, go to the right of the hostname and click on the funnel (“filter”) icon. You’ll get a screen like this:
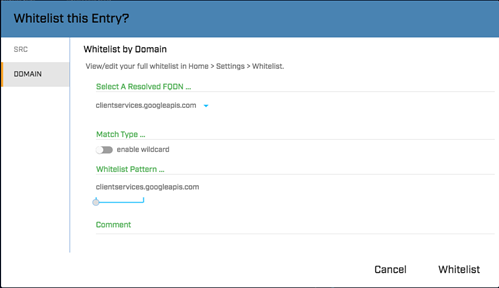
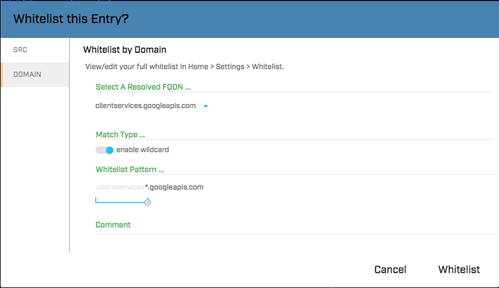
Since we want to whitelist all hosts in that domain, click on “Enable wildcard”. The pattern will change to “*.clientservices.googleapis.com”, which isn’t quite right; we want to whitelist everything under “googleapis.com”, not “clientservices.googleapis.com”. To fix this, go down to the blue slider bar in “Whitelist pattern” and move the dot to the right. You’ll see the pattern change to “*.googleapis.com”:
This allows you to remove these connections from the BeaconsFQDN display with a single whitelist entry. This whitelisting works for any host inside that domain, and any ipv4 or ipv6 address associated with that DNS hostname.
Note About Long Connections
Whitelisting by these hostnames (also called Fully Qualified Domain Names, or FQDNs) has one issue with long connections. If I open up a connection to register.googleapis.com and leave that connection open for days, I only have to find its IP address once, just before the start of the connection. By the time the connection has been open for more than 24 hours, that DNS lookup is no longer in the most recent 24 hours of Zeek logs, so the long connection reappears.
This is only an issue for connections that are kept open longer than 24 hours, and you can always whitelist these by IP address to avoid the issue.
Managing Whitelists
Import and Export
For starters, you have the ability to download your current whitelist. Go to the Dashboard, click on the Gear in the upper right, choose Whitelist, and click on “Export”. Your browser will save “whitelist.json” (or something similar if you already have one) in your downloads folder.
Please set up a reminder to download this no less than weekly so you have a good backup. Should it ever be necessary to send this back to a new AC-Hunter install, choose “Import” from that same location and it will prompt you for the name of the backup to restore.
Background: hash_key
Before 2020, AC-Hunter would apply the whitelist to a database by looking at each whitelist entry and comparing it to each connection in the database. On a system with 300 whitelist entries and a database with 20,000 connections, that would require 6,000,000 comparisons – ugh! This contributed to slow database imports and slow modifications to the whitelist.
Here’s the thing: we don’t have to do all those comparisons! Picture a connection entry between 12.13.14.15 and 44.45.46.47 on tcp port 12 . There’s no need to compare that to a whitelist entry for a “SafariSafeBrowsing” client certificate. 🙂
Without getting too far down in the weeds of exactly how this works, the short version is that we categorize both connections and whitelist entries into “buckets” so that we only need to compare the connections in bucket “A” with the whitelist entries that are also in bucket “A”. This provides an immense speedup, especially when there are huge numbers of connections, whitelist entries, or both.
This approach was introduced in January of 2020 and has dramatically improved AC-Hunter’s speed of whitelist processing.
The “buckets” we use to categorize connections and whitelist entries are stored as a long number in a “hash_key” variable; you can see this number in an exported whitelist entry
{"comment":"","domain":"weather.microsoft.com","hash_key":-6794843434150466000,"name":"weather.microsoft.com","schema_version":5,"type":"domain_literal"},
Connections acquire this value when imported from Zeek logs. Whitelist entries get this value when the whitelist entry is created or modified.
Changing the Whitelist Outside of AC-Hunter
The issue comes when one wants to manually add whitelist entries to a whitelist.json file and re-import it to AC-Hunter; how would we know what hash_key value to use?
We provide a tool called genhash (downloadable from https://github.com/activecm/safelist-tools/raw/main/genhash/genhash ) that can add these values to any whitelist entries that don’t have them. Here’s an example of how to add them:
#Do these steps once
wget 'https://github.com/activecm/safelist-tools/raw/main/genhash/genhash'
wget 'https://raw.githubusercontent.com/activecm/safelist-tools/main/one_entry_per_line.sh'
chmod +x genhash one_entry_per_line.sh
sudo mv genhash one_entry_per_line.sh /usr/local/bin/
sudo apt install jq || sudo yum install jq

#After any edits to edited-whitelist.json
cat edited-whitelist.json | genhash >whitelist.json
The resulting file (“whitelist.json”) will have these values added and can now be uploaded to an AC-Hunter instance.
Step-By-Step Editing
1. Download the whitelist from AC-Hunter (see the Dashboard tab, click the “gear” icon, select Whitelist, and press “Export”. You’ll end up with a file called whitelist.json in your downloads directory (possibly renamed to “whitelist (1).json” or similar if you already have “whitelist.json” there).
2. Pick the most recent download and move it to a work directory. Go to that work directory.
3. Reformat the whitelist so there’s one entry per line:
cat whitelist.json | one_entry_per_line.sh >whitelist-perline.json
4. Edit whitelist-perline.json.
a. If you’re deleting a whitelist entry, go ahead and delete the line.
b. If you’re adding a whitelist entry, add it but don’t include the hash_key field at all.
c. If you’re editing a whitelist entry, edit it and remove the hash_key field.
5. When you’ve made your changes, check that every whitelist entry except the last has a comma at the end of the line.
6. Save and exit.
7. Add hashes with:
cat whitelist-perline.json | genhash >whitelist-withhashes.json
8. Upload “whitelist-withhashes.json” to any AC-Hunter console that needs these changed entries.
Bulk Adding New Entries to the Whitelist
From time to time it may be helpful to, say, whitelist a long list of IP addresses without having to manually select them from the user interface or edit the whitelist file.
We’ve created 6 tools that allow you to create long lists of items to whitelist and will whitelist them for you.
You run these on the AC-Hunter system itself.
- To whitelist one or more CIDR network blocks as destinations, use whitelist_destination_cidr.sh . The file you create will have one CIDR block per line.
- To whitelist individual DNS hostnames as destinations, use whitelist_destination_hostname.sh . The input file will hold DNS hostnames (one per line), with no leading or trailing periods or asterisks.
- To whitelist IP addresses as destinations, use whitelist_destination_ips.sh . Each IP address will be on it’s own line.
- To whitelist pairs of IP addresses, use whitelist_destination_pair.sh . Each line of the input file will have a pair of addresses separated by a space.
- To whitelist one or more domain’s worth of hostnames as destinations (like the *.googleapis.com above), use whitelist_destination_wildcard_names.sh . The input file will contain the domain (like “googleapis.com”) without the leading “*.”.
- To whitelist IP addresses as sources, use whitelist_source_ips.sh . Each IP address will be on its own line.
As an example of using the above, let’s see how to add a list of IP addresses as whitelisted destinations:
1. Log into your AC-Hunter system under an account that has sudo privileges.
2. Download the collection of tools with:
git clone https://github.com/activecm/safelist-tools/
cd safelist-tools
3. Edit destination-ips.txt with your preferred editor. Place the IP addresses you wish to whitelist as destinations in there, one per line, with nothing else in the file. Save the file and exit.
4. Send these into AC-Hunter’s whitelist with the command:
./whitelist_destination_ips.sh destination-ips.txt
5. Log in to AC-Hunter, go to the Dashboard/Gear Icon/Whitelist and press “View/Edit”. Enter one of the IP addresses into the search box and you should see that whitelist entry show up.
Whitelist Synchronization
We have one more new feature – synchronization.
Let’s say you have 2 AC-Hunter consoles; one primary and one for disaster recovery. If you enter a new whitelist entry on the primary, it’s not carried over to the DR console, so you have to either enter it on 2 systems or regularly download the whitelist from the primary and upload it to the secondary.
To avoid the manual work, we’ve written a tool that synchronizes the whitelists of multiple AC-Hunter consoles. To see more about how this works, see https://www.activecountermeasures.com/safelist-synchronization/ .

Bill has authored numerous articles and tools for client use. He also serves as a content author and faculty member at the SANS Institute, teaching the Linux System Administration, Perimeter Protection, Securing Linux and Unix, and Intrusion Detection tracks. Bill’s background is in network and operating system security; he was the chief architect of one commercial and two open source firewalls and is an active contributor to multiple projects in the Linux development effort. Bill’s articles and tools can be found in online journals and at http://www.stearns.org.