Adding a 2FA to Any Network Service
Intro
In a perfect world, every service that we need to access would be able to clearly identify us with little or no chance of giving access to the wrong person. For years we’ve been told – and have passed along to our users – that we should all use something stronger than a password to make that happen. 2 factor authentication (“2FA”) – using a security token in addition to a password – may not be perfect, but it’s one of the best options we have at the moment.
The problem is that not all services we access know how to accept a second factor, so they fall back on just asking for a password. And that’s just asking for trouble.
Let’s use an inventory system as our example. We have to enter a username and password when we first connect and then we get, say, 24 hours before we have to log in again. What happens if one of our users uses the same password everywhere and entered it into a malicious web form yesterday? Could that attacker behind that form guess their account name (first initial + last name) and pair it with the newly captured password? Heck, I’d certainly start there.
The difficult points of these scenarios is that 1) they’re not just theoretical, and 2) there’s not much we can do about them. If the inventory package only knows how to ask for a password, we can hardly shoehorn a second factor into the login process. (Granted, we may have access to the source code and could add it, but that’s not always possible.)
Let’s assume we can’t modify the source code or it’s not practical to do so. What other options do we have?
What Is a Service?
There’s just one piece of technical background you’ll need to know: every service we depend on – email, video streaming, web servers, name lookups, file transfers, etc. – listens on a port. Every internet-connected system has about ~131,000 available ports; 65,536 TCP ports numbered from 0 to 65,535, and 65,536 UDP ports also numbered from 0 to 65,535 too (and a few others outside of TCP and UDP). Every service we access is located on one of those ports (infrequently, on 2 or more ports). Encrypted web servers like your www.yourbank.com? They almost always listen on TCP port 443. IMAP email servers? TCP port 143. Google meet? UDP port 19305 and a few others. The mysql database server? That’s on TCP port 3306.
The examples happen to all be ones that will require some kind of authentication, and those are the ones we care about in this article. While some of these may support 2FA, many of them don’t. Those are the ones we’ll focus on.
Goals
When a user connects to the inventory system, they’re asked for a username and password. If those are valid they can access and modify all inventory records. Unfortunately, this was code written by an outside firm so we can’t update it to also ask for a second factor.
If we had our choice, we’d want:
- The ability to require a second factor before one could access the inventory system.
- To add this without changing the source code of the system.
- Everyone in the organization to use it.
- The system to be inexpensive, for initial purchase, monthly costs, and per-user licensing.
- The system to be auditable so we can show it’s trustworthy.
- A way to recover if a 2FA token is lost or stolen.
- It simple to update and quick to reconfigure if a user leaves the company.
- Reliable operation.
- It simple to teach to end users.
With those goals – and the knowledge that all services listen on ports for incoming connections – we have all we need to add 2-factor authentication to an existing service.
Selective Hearing
The default for services like our inventory system is that they will accept connections from any other system in the world. Your employee workstations – good. Employee laptops while working from home or on the road – good too. Random people next to them in the coffee shop – hmm. Attackers from countries we might not even know how to spell – wait a minute!
If we turn that upside down, we could block access to the inventory system’s listening port (TCP port 8011 in this example) by default, and only open it up to our employees when they provide a valid second factor. An attacker who can’t do this will get nothing back – not even a prompt asking for a username and password. The end effect is that one needs to present the second factor first, and if that’s valid, they’ll get the chance to log in with a username and password.
Port Knocking
Port knocking is one of the earliest approaches for this. Here’s an example: to get access to an existing port like our TCP port 8011, you have to first connect to UDP port 9086, then TCP port 11427, then TCP port 14. The server system remembers the ports you connected to, makes sure you connected to them in the right order, and if so, opens up TCP port 8011 to give you access to the inventory. This works and there are some good tools that implement it, but having to make raw network connections is a little too high on the geeky scale for most users.
One-Time Passwords to a Second Port
We’re going to modify the approach a bit. Each user will send a one-time password (so called because once it’s used you can’t use it again but must instead generate another one) to a different port on the system. The second port validates that the one-time password is correct and hasn’t been used before, and when that’s done, allows that user to access the original port they care about. Next, they log in like normal. An attacker without the ability to submit that one-time password won’t even be able to reach the inventory system, much less login.
While it sounds complicated, it’s really not. Here’s what the user does:
- Open a web browser
- Types in most of a URL, like: http://inventory.example.com:8975/ and leaves the cursor just after the last slash without pressing enter.
- They insert a Yubikey into the USB port and press the sole button on the top for 1 second. This types out the OTP right after the slash and presses enter to request that URL.
(In the background, the OTP is validated and the user is granted access to port 8011) - Now they go to the main inventory system, https://inventory.example.com:8011/
Obviously, both of those URLs can be in their bookmarks.
That’s it. The user has provided a second factor in addition to a password, and it was really no more complicated than pressing a button on a token they carry on their keyring.
So What’s a Yubikey?
A Yubikey looks a little like a flat flash drive that’s 1.75″ long:
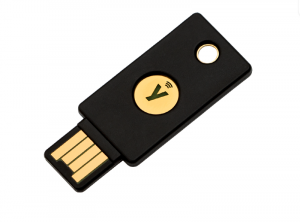
They are simple; It can be placed on a keyring so you don’t lose or forget it. It connects to a USB port like a flash drive. Unlike a flash drive it doesn’t store anything; it only generates one-time passwords (and lots of other authentication features we won’t cover in this article). The only user interface is a single silver or gold contact on the top that the user presses when they want to generate a one-time password.
These are reliable; there’s no battery to wear out or replace, and they survive years of abuse. I regularly use one I bought over a decade ago.
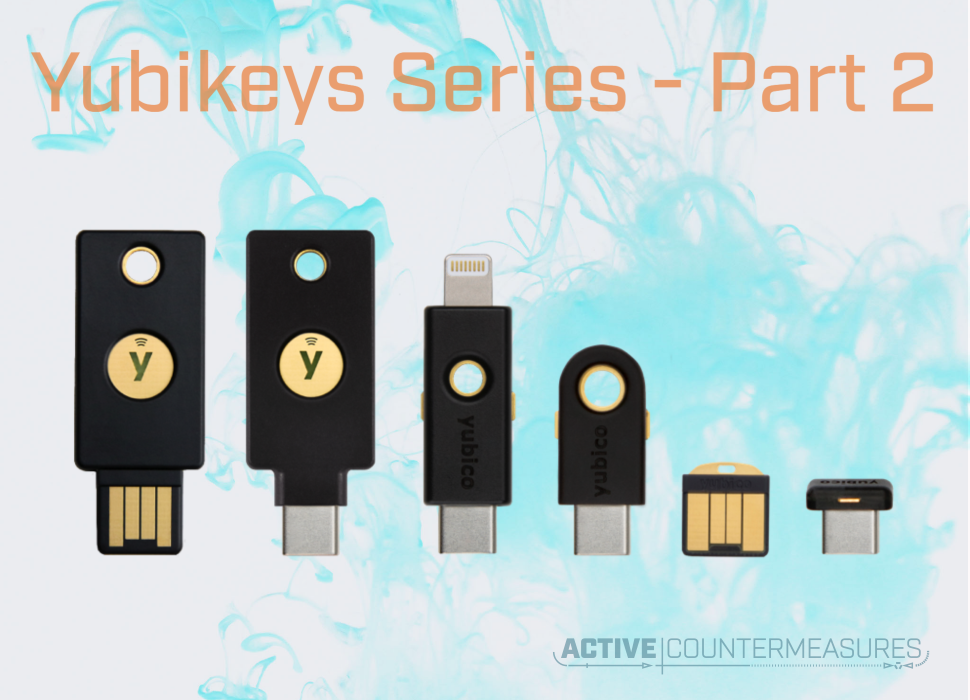
The pricing is good too; the above token is $45 each and that’s a one-time purchase with no monthly subscriptions or fees. Versions that connect to USB-C ports start at $50 and there’s a lightning+USB-C model for $70. (While I won’t cover them in this article as the authentication approach is different, Yubico also sells tokens with fingerprint readers. See https://www.yubico.com/store/ for the whole list.)
The sysadmin group can purchase a few spares for new employees and for occasions when a key is lost.
How Does This Work on the Server End?
The server runs one more piece of software called “yubiknock”. It listens on TCP port 8975 and waits until some other computer sends it one of these one-time passwords. Once it has verified that the OTP is valid, it runs a command of your choice, like: “open up TCP port 8011 to the requesting system.”
The program is free of cost and open source (so you can check it and make sure it’s not trying to do something malicious.) That means the only cost is the initial purchase of the yubikeys, one per user plus a few spares.
I’ve documented the setup process at the end of this article.
Q&A
Could a Yubikey be used for services on multiple servers?
Yes.
Do we get anything from Yubico for distributing this software or writing this article?
Nope.
Does this work on _____?
Yes, in almost every hardware, OS, and software platform. No drivers are needed; it presents itself as another keyboard. It should be compatible with foreign keyboard layouts (though there may be an issue on systems using Dvorak layout.) If you own a USB-A yubikey and need it to work on a USB-C laptop (or vice-versa), a simple USB converter is all you need.
Could I buy the ($25) FIDO Security Key (or a token from another vendor) instead?
Not for this project. While they’re both capable and certainly useful for a number of authentication tasks, the FIDO Security Key doesn’t generate the OTP in the way this project needs. The keys you buy should list “Yubico OTP” in their feature set. Both the Yubikey 5 and Yubikey 5 FIPS series offer this.
Opening up a port is nice, but could I instead perform some other action?
Sure, effectively anything you can accomplish at the command line. Here are some examples:
– Halt the system
– Start or stop a running service
– Lock or unlock a user account
– Enable a VPN link to a remote system
The yubikey-authorize script can run any combination of these for a given key, and can even have a different action for each key.
Setting up Yubiknock
This tool has been tested on MacOS and Linux. It requires python version 3, which is included with those. It’s possible it will work on Windows as long as you have python 3 and bash installed, though the commands you will run on a Windows system will likely be different.
- Buy one or more Yubikeys from https://www.yubico.com/store/. You’ll need at least one in hand for the next step.
- Sign up with Yubico to use their validation service at https://upgrade.yubico.com/getapikey/. All they request is your email address and a single confirmation password from a Yubikey; they’ll return a number that’s your ClientID and a SecretKey. You’ll use the ClientID when you run yubiknock.py. You only need to do this once, not for each key you buy.
- Download yubiknock.py and yubiknock-authorize-examples from https://github.com/william-stearns/yubiknock. Save them to a directory from which you can run scripts (like /usr/bin/ ).
- Copy yubiknock-authorize-examples to yubiknock-authorize:
cd /usr/bin/
cp yubiknock-authorize-examples yubiknock-authorize
- Make both tools executable:
chmod 755 yubiknock.py yubiknock-authorize
- Customize yubiknock-authorize. Pick the program you want to run when authorization is successful.
- Start yubiknock.py with a command like the following (use the ClientID you received from Yubico):
yubiknock.py -c ClientID -e /path/to/yubiknock-authorizeIf you want to run it on a different TCP port, specify that with “-p”:
yubiknock.py -c ClientID -e /path/to/yubiknock-authorize -p 9999
Note that if yubiknock-authorize needs to run commands as root, yubiknock.py will also need to be run as root (or you’ll need to spend some time with setting password-less sudo, not covered in this article).
- Submit your one-time password via your web browser. Start a URL that looks like one of the following:
http://ip.address.of.server:8975/
http://hostname.of.server.com:8975/
http://[ipv6:address:of:server]:8975/
, replacing 8975 with your port if you changed it above. Make sure the cursor follows the final slash. Insert your yubikey into a USB port and press the button on the top; the OTP will be appended to this URL and submitted. You should get back a confirmation in your browser: Yubikey verified.
After the key is verified, the commands you placed in yubiknock-authorize will be run.
Since you’re connecting with HTTP, note that you may need to tell your browser to allow “insecure Content” from this port as HTTP is not encrypted.
- Set this command up to start at system boot.
Alternate Ways to Submit the OTP
- On the command line (or in a shell script) you can use curl, wget, lynx, or links as your web browser.
wget -q -O - http://address.of.server:8975/
curl -s http://address.of.server:8975/
Just as with a graphical web browser you’ll leave the prompt right after the last slash and press the button on the Yubikey instead of pressing enter.
- You can also use any other tool that can connect to a TCP port, like netcat. With netcat, you run this command like normal (don’t append the OTP to it):
nc address.of.server 8975<enter>Once it’s running press the button on the yubikey.

Bill has authored numerous articles and tools for client use. He also serves as a content author and faculty member at the SANS Institute, teaching the Linux System Administration, Perimeter Protection, Securing Linux and Unix, and Intrusion Detection tracks. Bill’s background is in network and operating system security; he was the chief architect of one commercial and two open source firewalls and is an active contributor to multiple projects in the Linux development effort. Bill’s articles and tools can be found in online journals and at http://www.stearns.org.