BeaKer – Instant Forensics!

Intro
In AI-Hunter 3.8.0 we introduced BeaKer – the supporting tool that makes it possible to investigate the source of network connections without leaving your desk. Here’s how it works:
- Your Windows systems send over summaries of their network connections to a BeaKer server.
- That system remembers those connections and sets up an easy search interface for them.
- When you come across suspicious traffic in AI-Hunter, you click on the BeaKer icon, which opens up a new tab in BeaKer with the search that will show that traffic.
- BeaKer will show extra information about that network traffic; in particular, the program that opened the connection and the username under which it was run. Hopefully this is enough information for you to decide that the traffic is benign and whitelist it, or that the traffic is malicious and shut it down on that system.
- As a side note, while BeaKer is easily integrated with AI-Hunter, you can also do your own searches in it directly.
Setting up BeaKer
There are a few steps needed to make this happen.
Install the BeaKer module
(AIHHosted users: this step has already been done for you).
The AI-Hunter installation script:
install_acm.sh
has an option to also install BeaKer. This is by far the easiest way – it loads up all the modules needed and sets up the connection between AI-Hunter and BeaKer (so when you click on the BeaKer icon you’re immediately sent to the BeaKer search page for the traffic you’re seeing.)
To install this way, add ” beaker beaker.ip.address.or.hostname” to the install_acm.sh command line, like:
./install_acm.sh aihunter 12.13.14.15 beaker 12.13.14.15 bro 5.6.7.8
This will install bro to 5.6.7.8 and both AI-Hunter and BeaKer to 12.13.14.15. Placing both AI-Hunter and BeaKer on the same system is an efficient use of resources, though you can place them on different machines if you choose.
During the installation you’ll be asked for passwords for two accounts. The “elastic” account is the one you’ll log in as when you use BeaKer inside a web browser (at https://beaker.ip.address:5601). The “sysmon-ingest” account and password are used by your Windows agents to send their connection information to the BeaKer system; see the next step.
If you’re installing BeaKer independently of AI-Hunter, see the documentation at the source code repository ( https://github.com/activecm/BeaKer ).
Install the Windows Agent on Your Windows Systems
To install the agent, download the file https://raw.githubusercontent.com/activecm/BeaKer/master/agent/install-sysmon-beats.ps1 to the Windows machine(s) you wish to monitor. Go to the download directory and run it as:
.\install-sysmon-beats.ps1 ip.or.hostname.of.beaker.server 9200
The script will then ask you for the username (“sysmon-ingest”) and password (the password you provided for the sysmon-ingest account during the install). Once the install is complete, the agent will send summaries of this system’s network connections to the BeaKer server.
Obviously, BeaKer can only return results for Windows systems that have its agent installed and feeding connection summaries.
Using BeaKer
To log in to the web interface and perform searches by hand, go to https://beaker.ip.address.or.hostname:5601 (if you’re going directly to an IPv6 address, make sure you place it inside square brackets like: https://[2400:abcd:eeee::d001]:5601 ).
The first time you log in you’ll be asked for your username and password. The username to use is “elastic”, and the password is the one you entered when you did the install (AIHHosted users; see below).
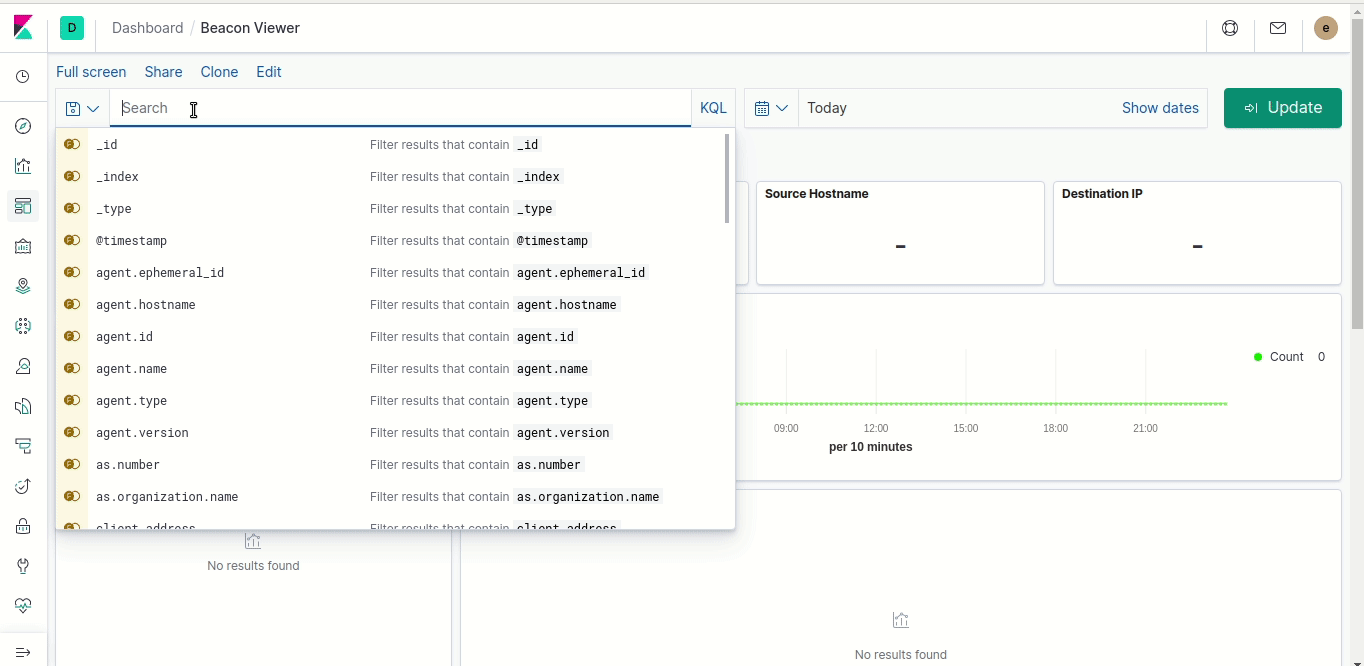
To see all connections from one machine to another, start with a search like this in the field to the left of “KQL”:
source.ip:10.22.6.4 and destination.ip:8.8.8.8
As soon as you start typing in that box you’ll get a drop-down hint box showing the various types of fields you can use.
Here’s an animation of the process:
You’ll probably get a lot of connections, so the next step is to narrow down the search to a smaller time period. Click on the calendar and either select one of the quick options (like “Last 1 hour”) or enter a starting and ending date and time. This will narrow down the list, making it easier to find the specific connection you want.
Notes
- BeaKer is open-source; it’s released under the GNU GPL 3.0 . The source code and some more notes about its use can be found at https://github.com/activecm/BeaKer .
- We’ve tested the BeaKer server under Ubuntu Linux 16.04 and CentOS 7. It is likely to work under other Linux systems just fine.
- The system hosting the BeaKer server should have at least 2 processor cores and at least 8GB of memory. The amount of memory and the number of processor cores will increase as more systems feed their connection details.
- The BeaKer agent has been tested on Windows 10 x86-64. If you’re using a different version of Windows please let us know if you run into any problems or if the tool works fine.
AIHHosted Systems
AI-Hunter hosted (AIHHosted) users already have BeaKer installed on the same system as AI-Hunter itself. The two usernames and passwords (for the “elastic” and “sysmon-ingest” accounts should already have been shared with you; contact [email protected] if you’ve not received them.
FAQ
When clicking on the BeaKer icon in AI-Hunter, nothing happens.
This is a known bug in 3.8.0 and has not been scheduled to be fixed. The faq entry at https://portal.activecountermeasures.com/support/faq/?Display_FAQ=2757 provides a workaround.

Bill has authored numerous articles and tools for client use. He also serves as a content author and faculty member at the SANS Institute, teaching the Linux System Administration, Perimeter Protection, Securing Linux and Unix, and Intrusion Detection tracks. Bill’s background is in network and operating system security; he was the chief architect of one commercial and two open source firewalls and is an active contributor to multiple projects in the Linux development effort. Bill’s articles and tools can be found in online journals and at http://www.stearns.org.